

Paythread is built around one core flow: you do work, you track it, you invoice it, you get paid. This guide walks through every step of that lifecycle so you can see how the pieces fit together.
Step 1: Start the Timer
When you sit down to work, open Paythread and start the timer. Give the entry a description and select the client. The timer runs in the background while you work, so you can switch tabs or close the app and it keeps counting.
If you're doing fixed-price or quantity-based work instead of hourly, you can create a fixed or multiplier work item directly. But for most freelancers, the timer is where the flow begins.
Step 2: Stop and Save
When you finish the task, stop the timer. Paythread saves the work item with the elapsed time, your hourly rate, and the calculated amount. Review the description to make sure it clearly communicates what you did. Your client will see this text on their invoice, so "Website updates" is better than "misc work."
You can edit the duration if the timer ran during a break, or adjust the description before moving on. Once saved, the work item moves into your unbilled queue.
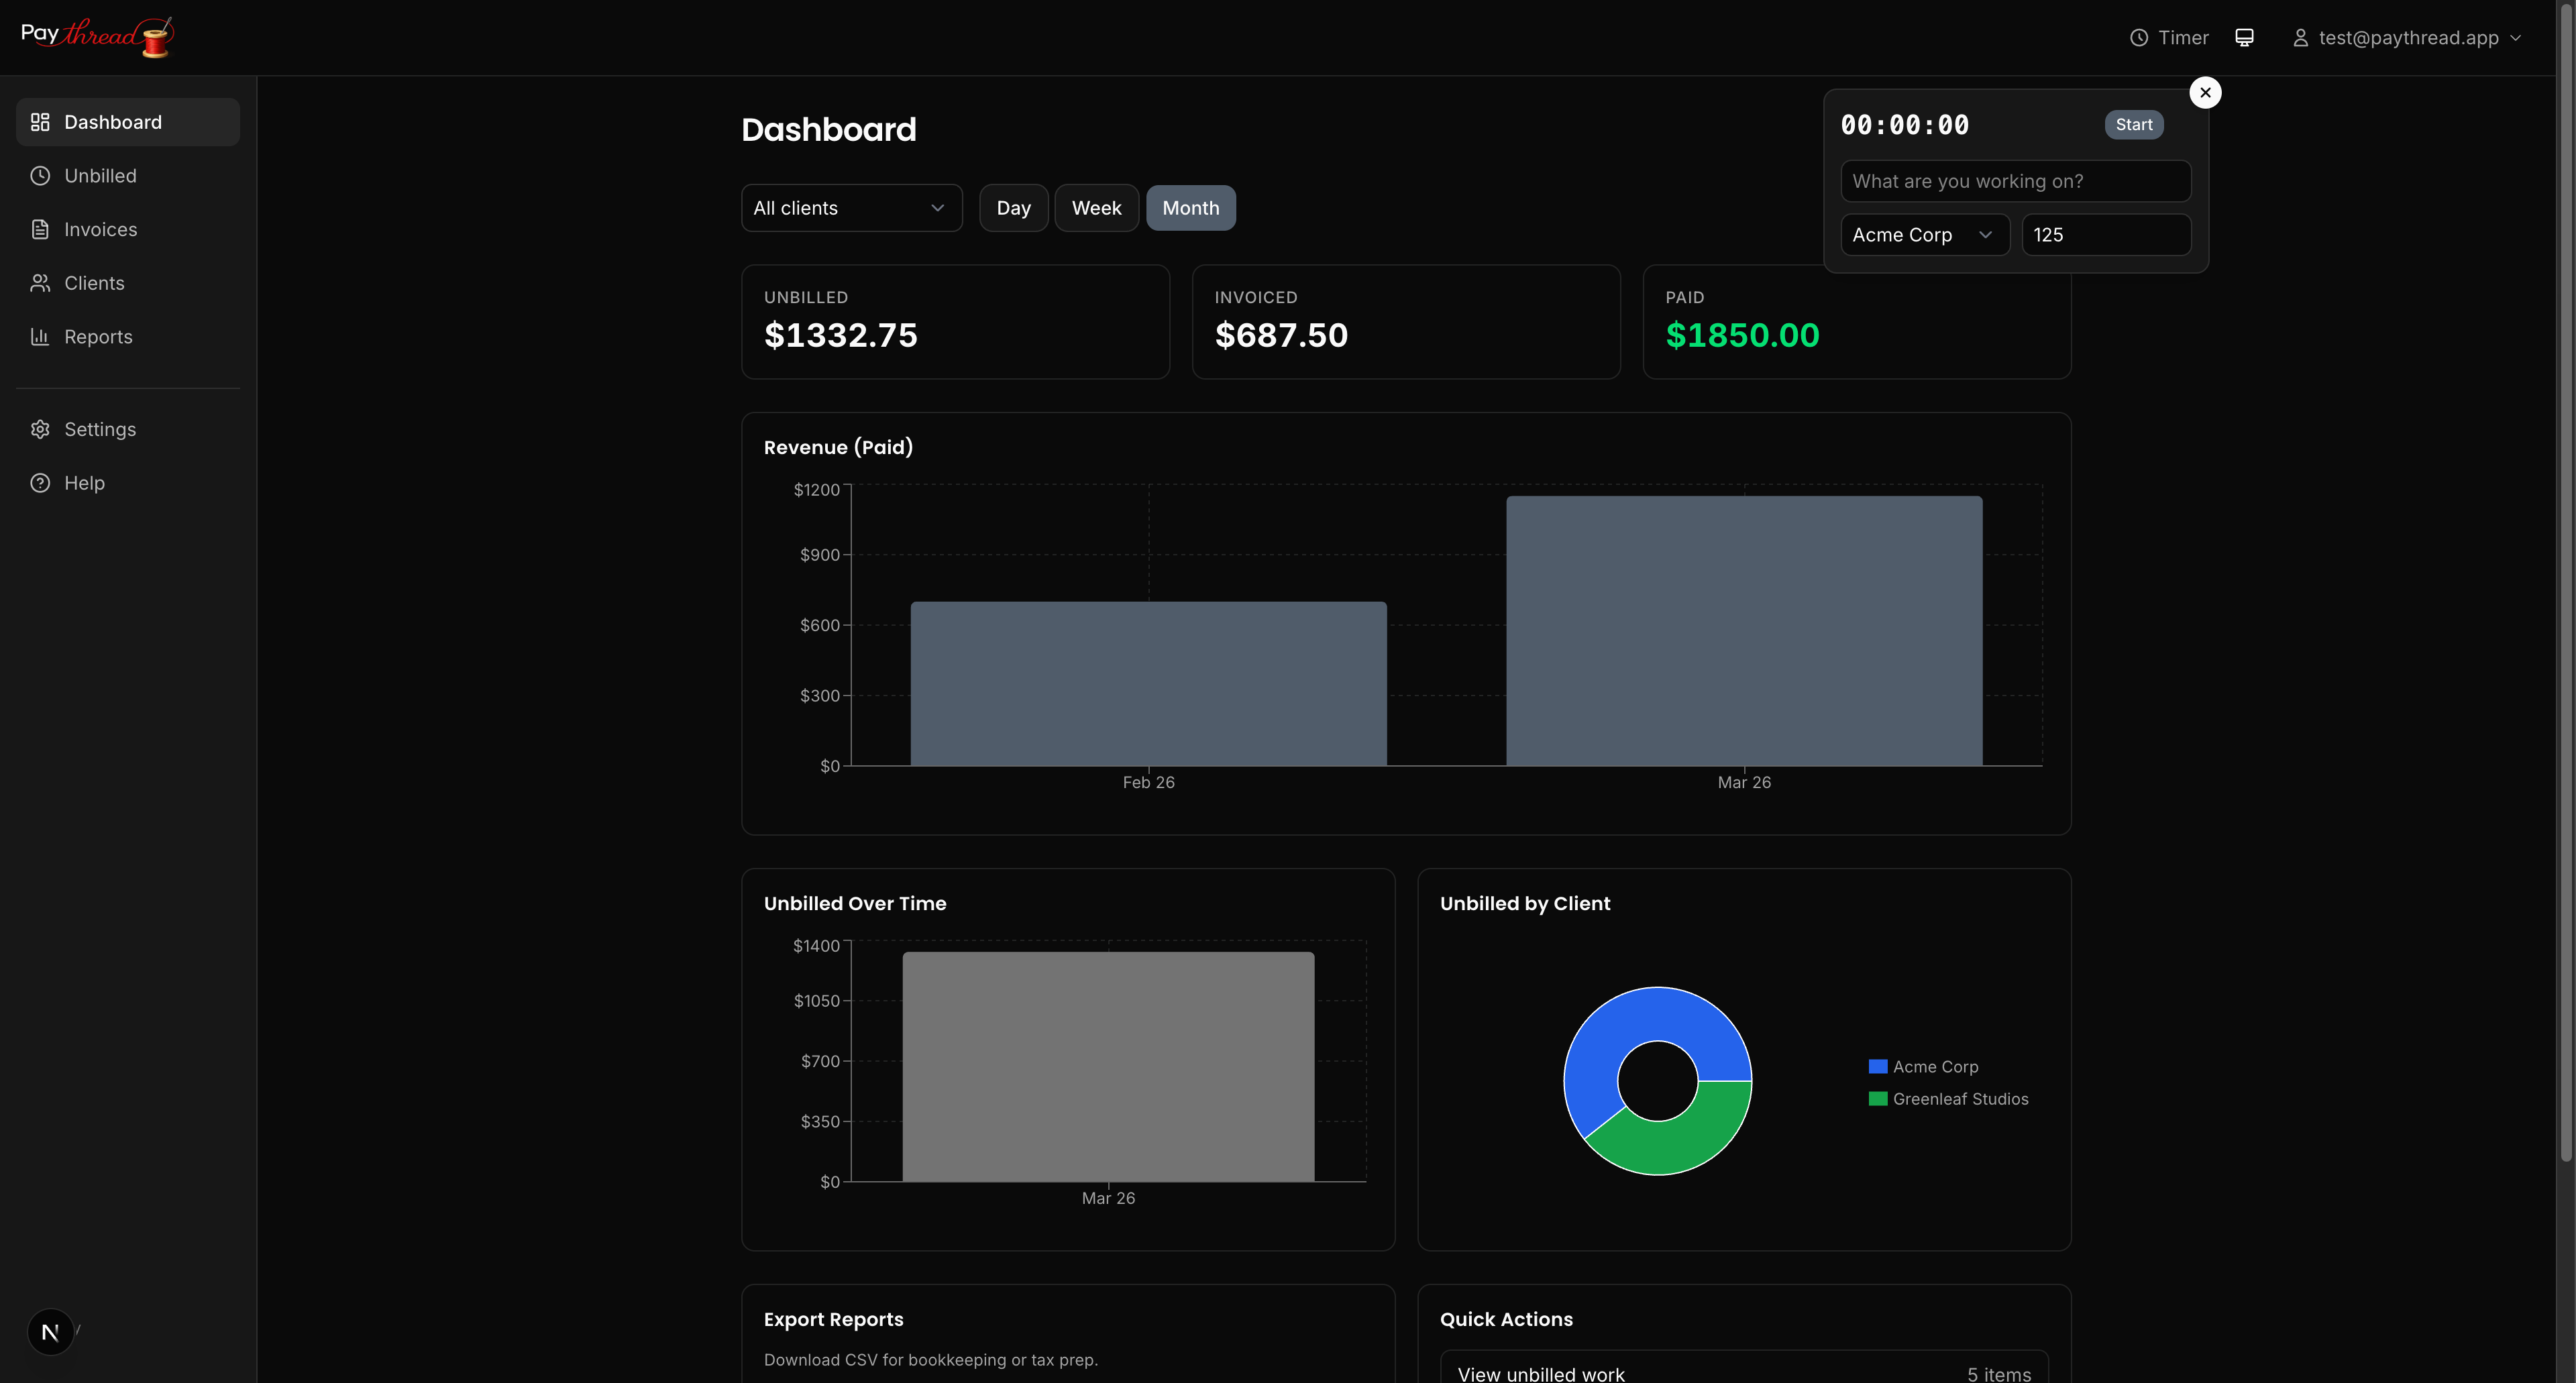
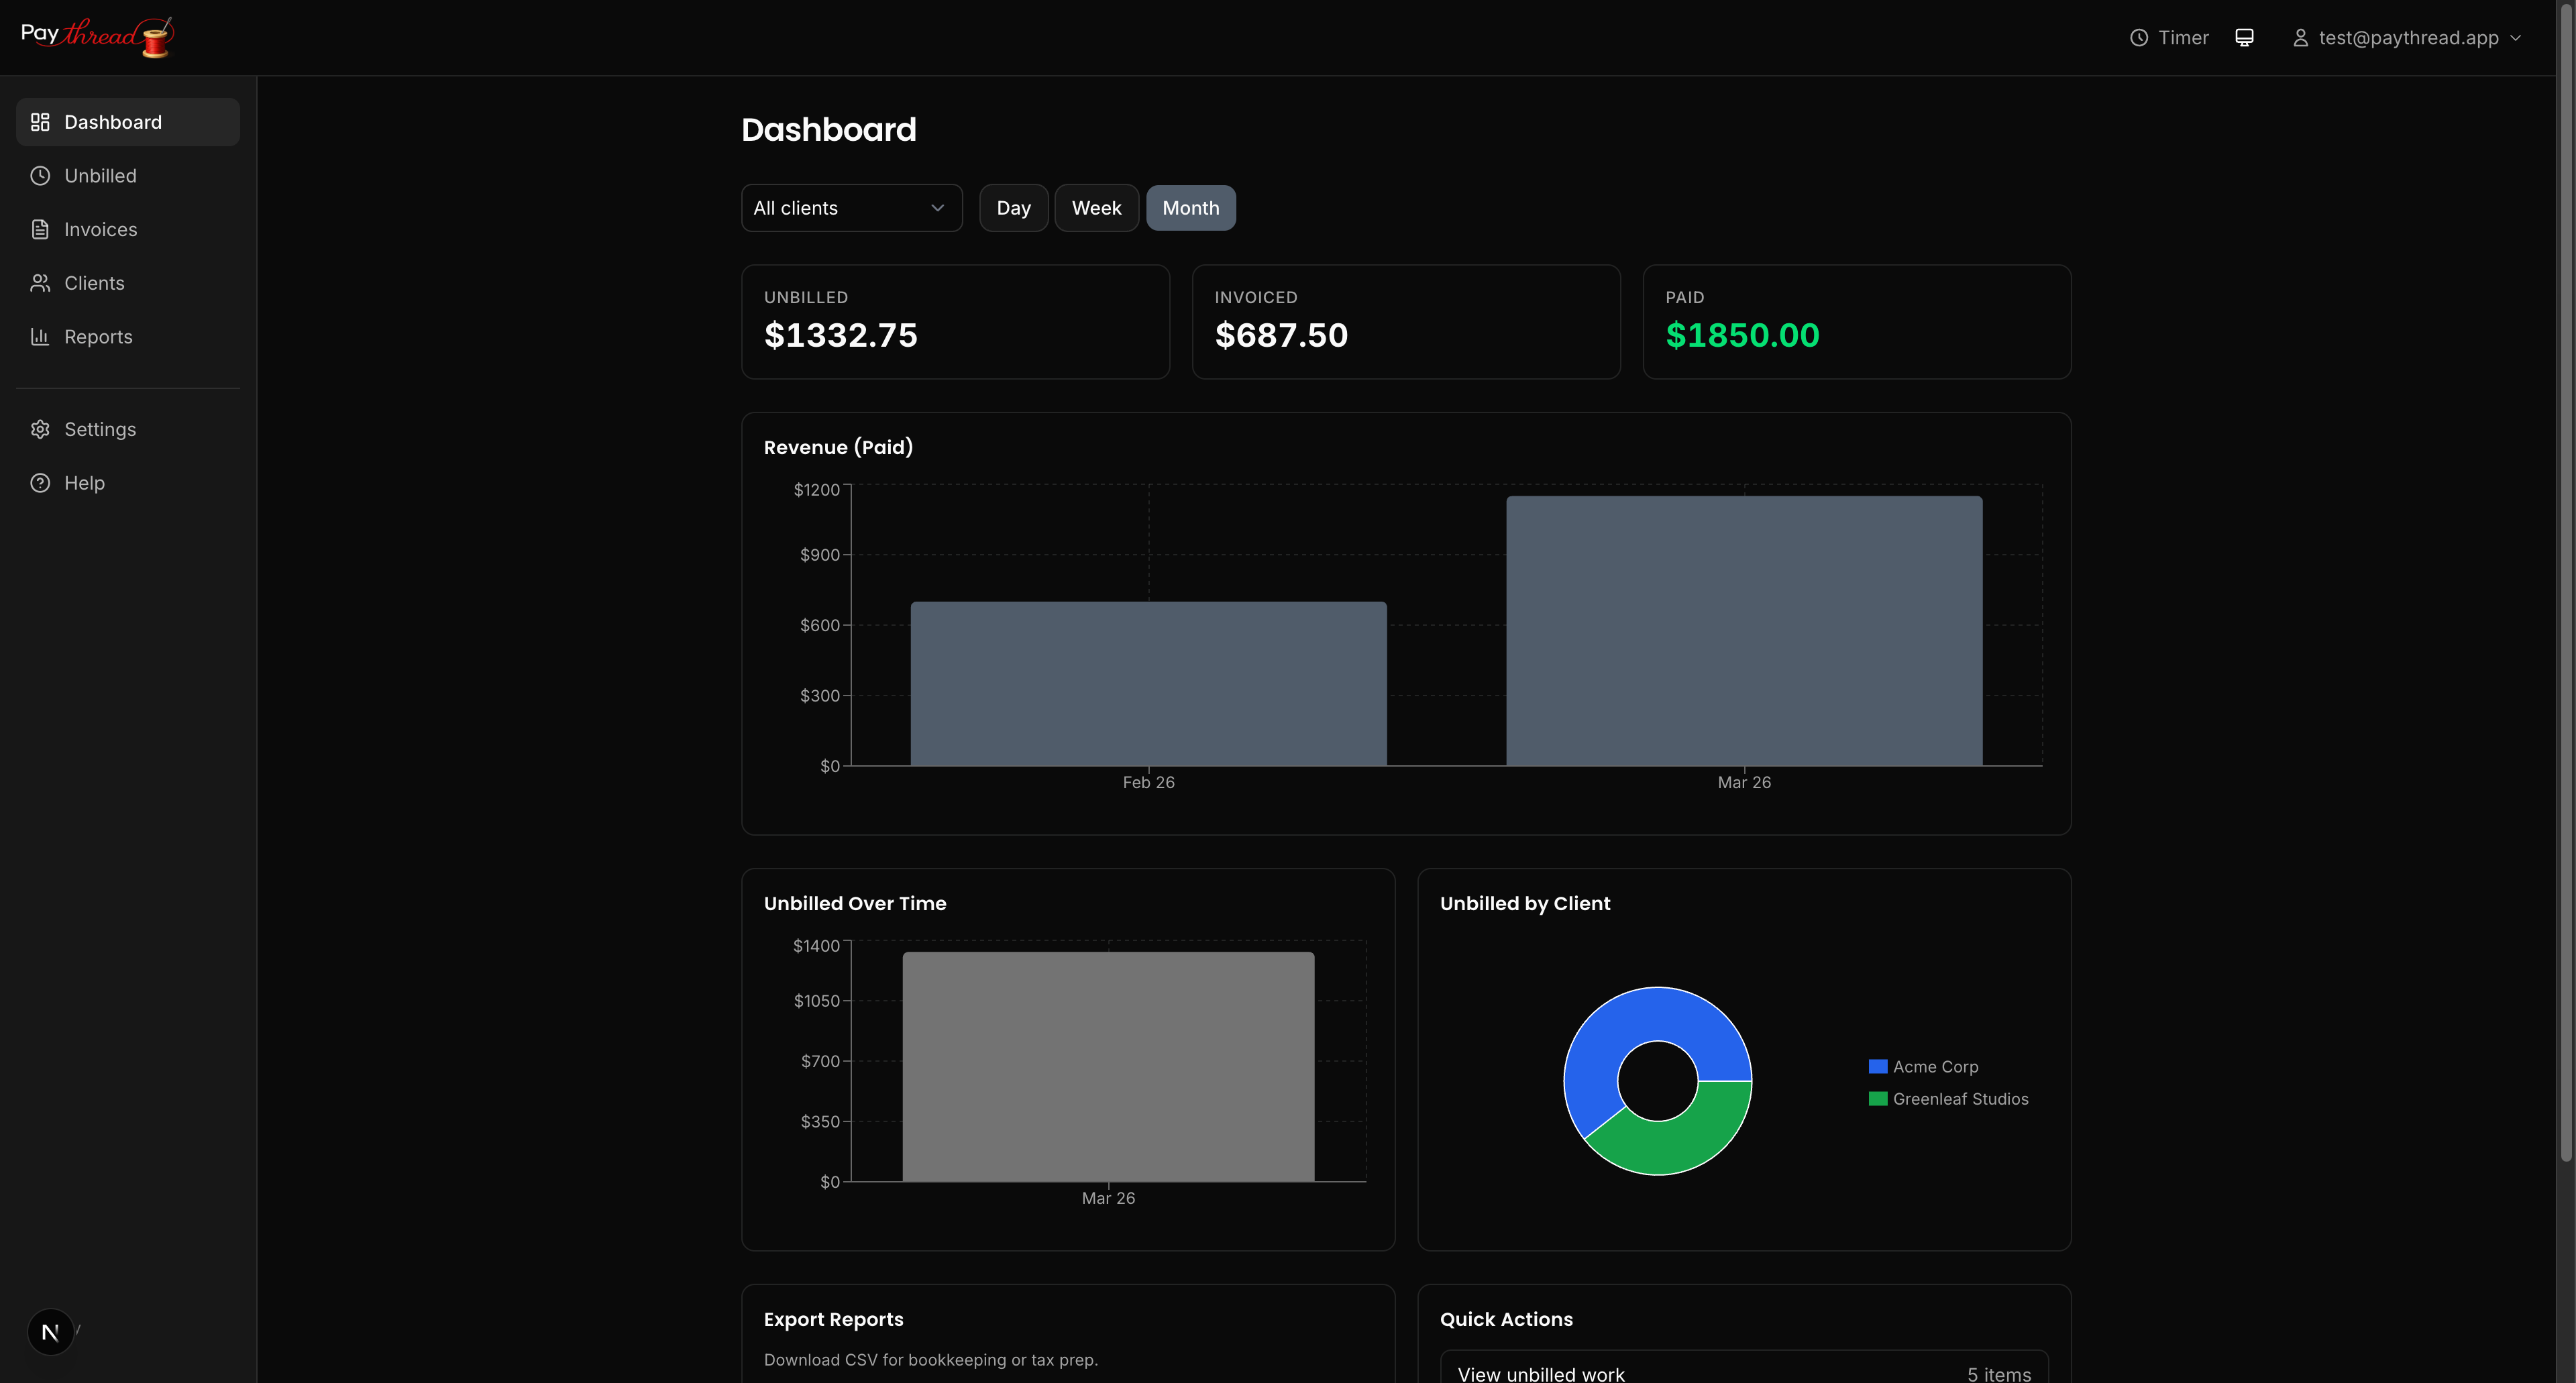
Step 3: Review the Unbilled Queue
The unbilled queue is your staging area. All completed work items that haven't been invoiced land here, organized by client. At the end of the day or week, review the queue to make sure everything looks accurate.
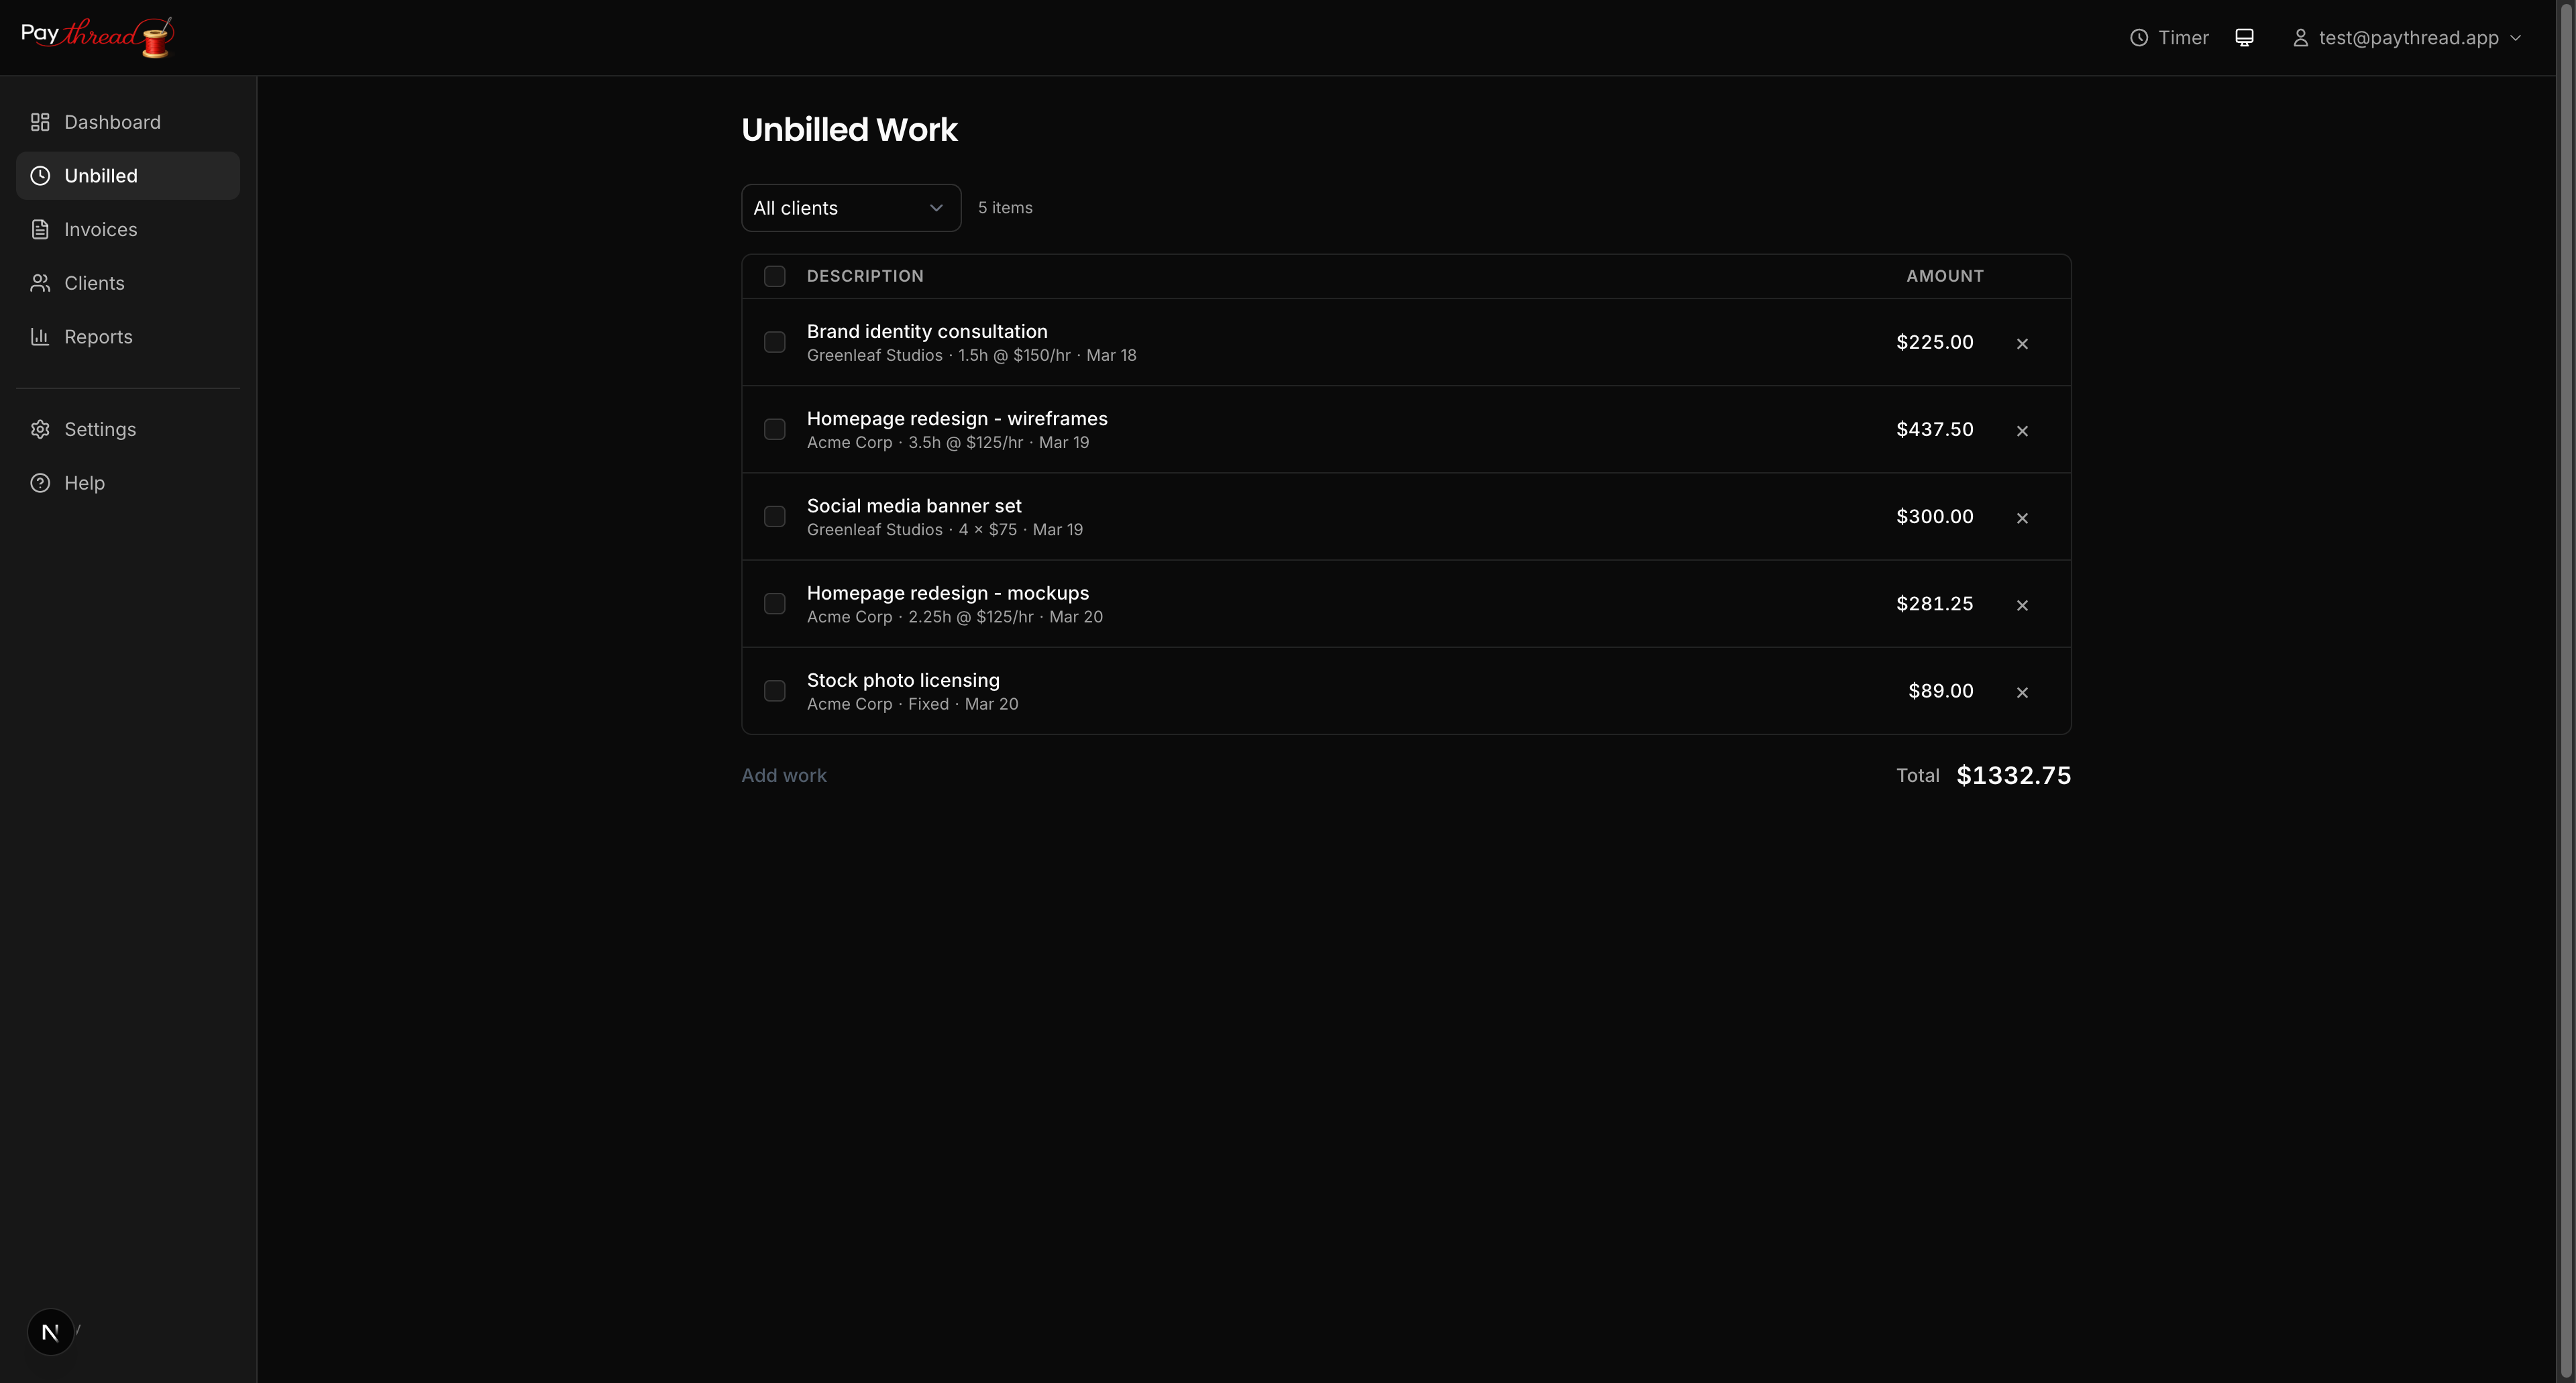
This is your last chance to fix descriptions, adjust amounts, or add work items you forgot to track in the moment. Take a few minutes to get it right, because once items are on an invoice, changes get more complicated.
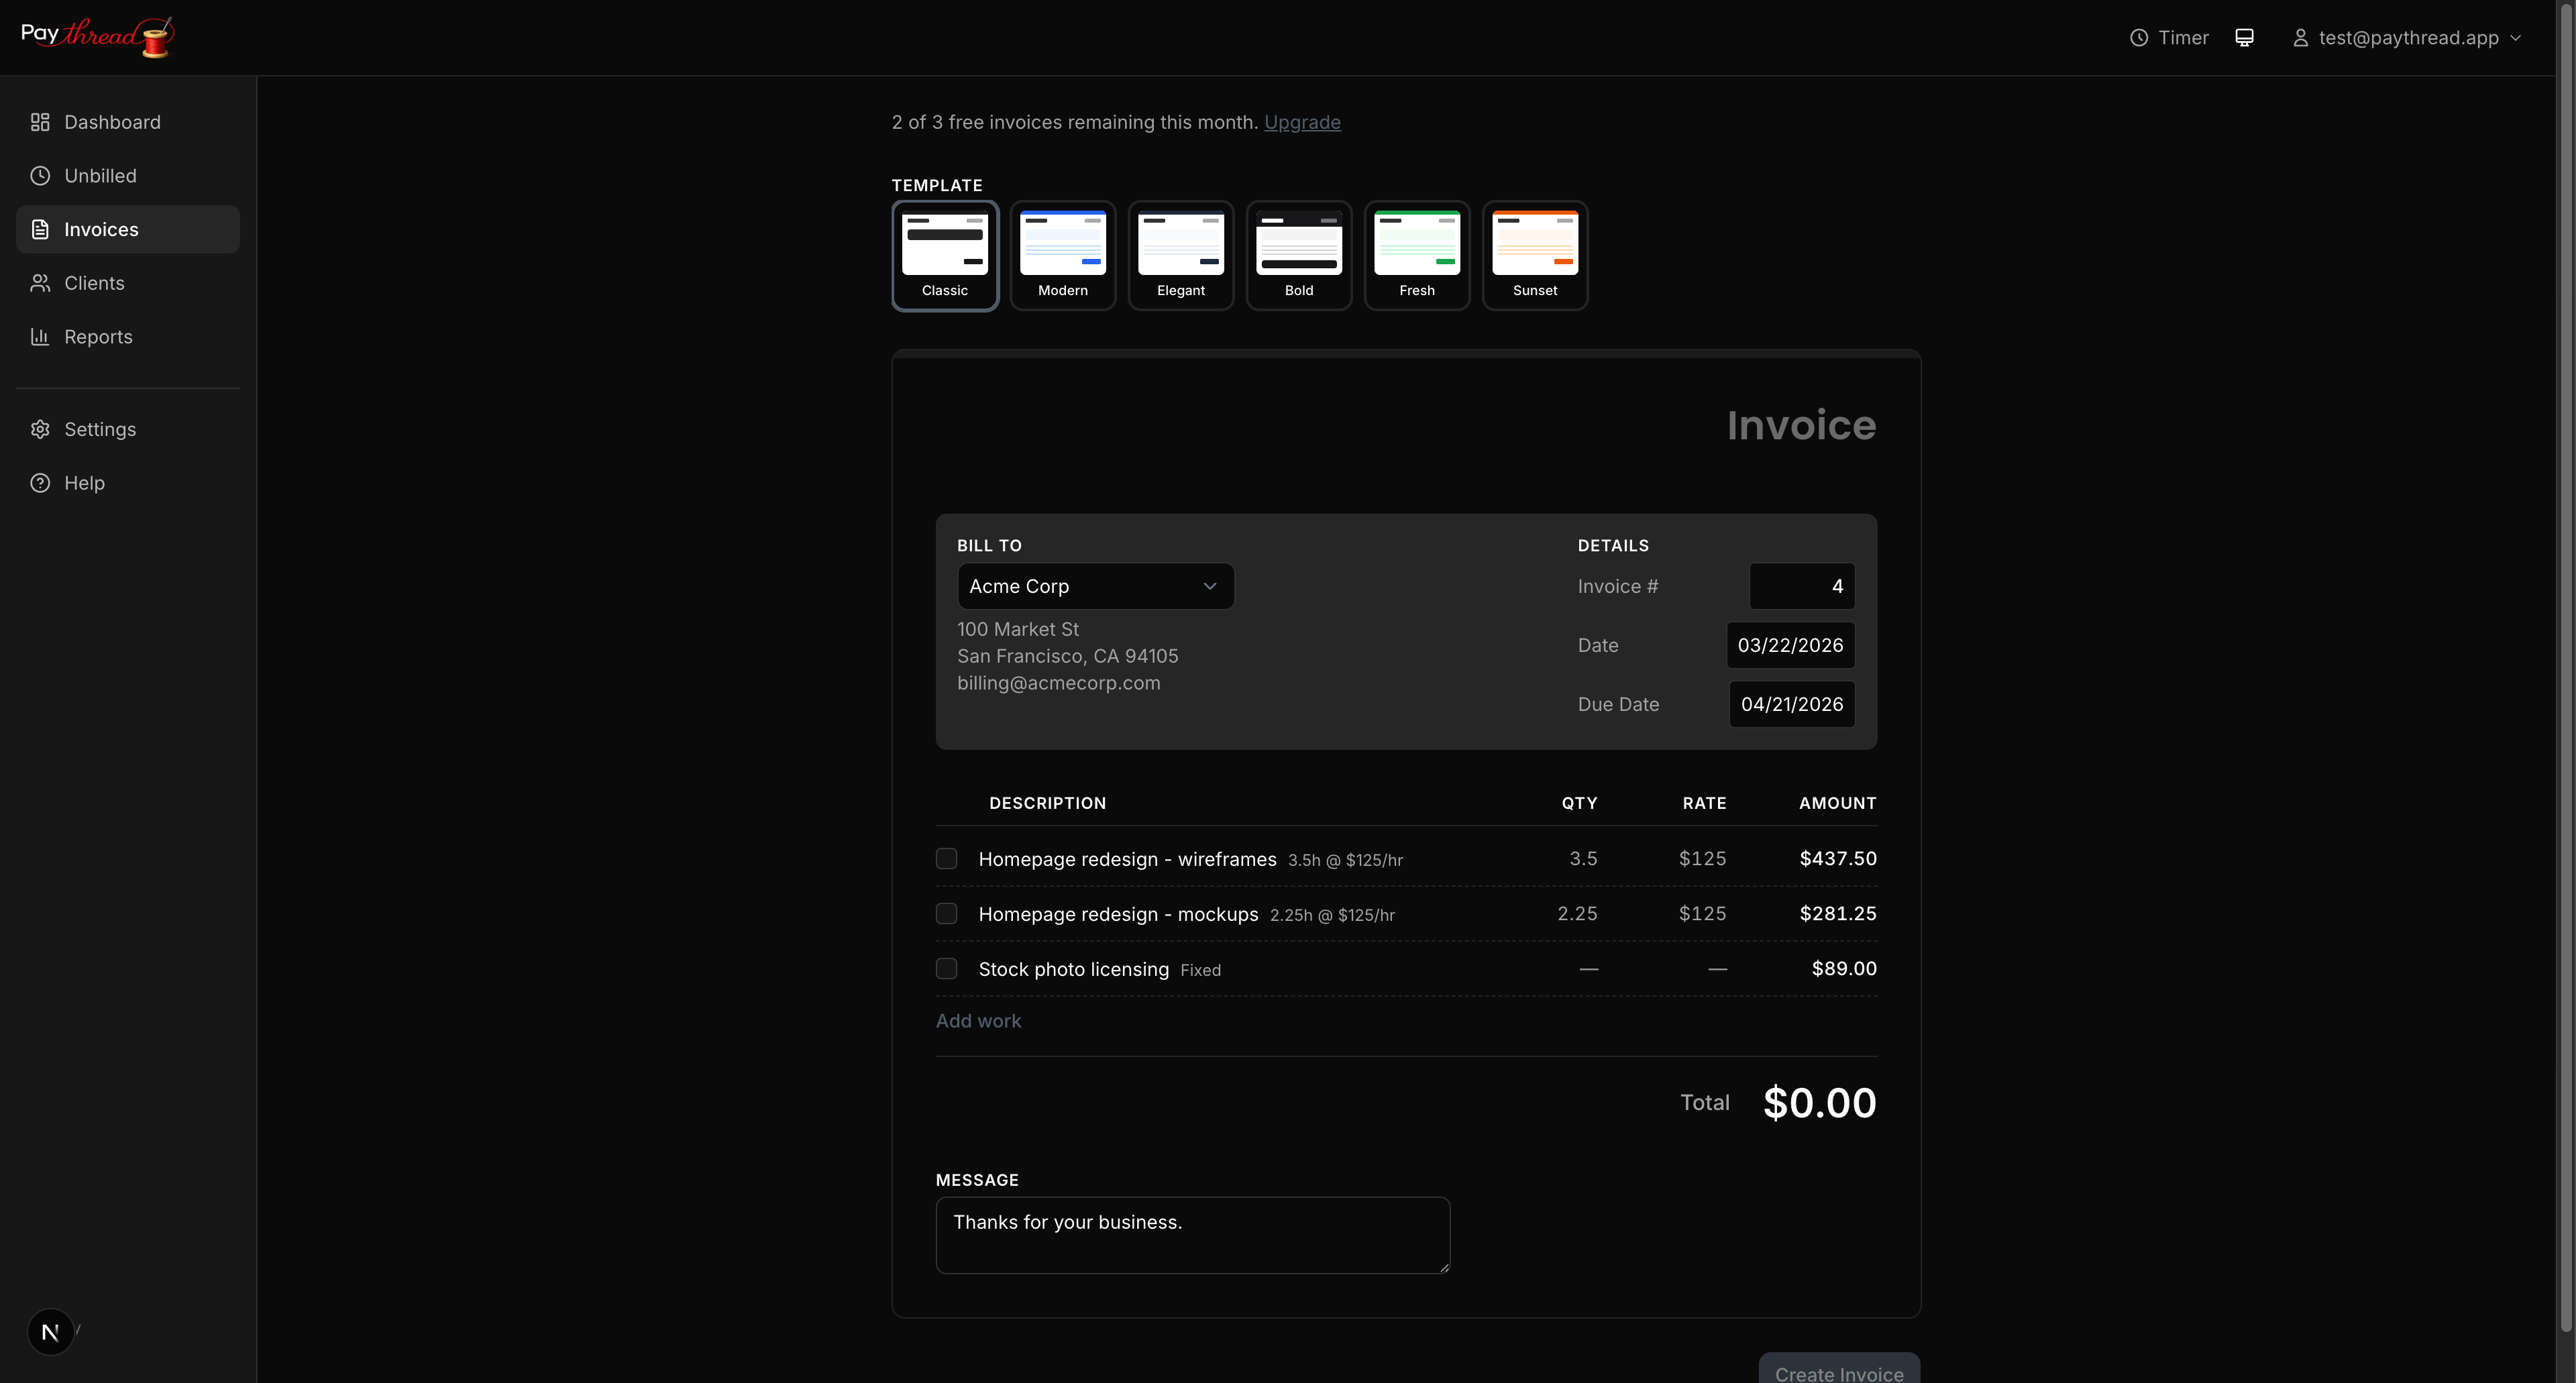
Step 4: Create the Invoice
Select the unbilled items you want to include and click to create an invoice. Paythread pulls the items into the invoice builder where you can:
- Choose from six professional templates (Classic, Modern, Elegant, Bold, Fresh, or Sunset)
- Add or adjust line items
- Set a due date
- Include notes for your client
- Select which payment methods to display
Step 5: Send to Your Client
Once the invoice looks right, send it. Your client receives a link to a clean, professional invoice page. They can review every line item, see the total, and find your payment options all in one place.
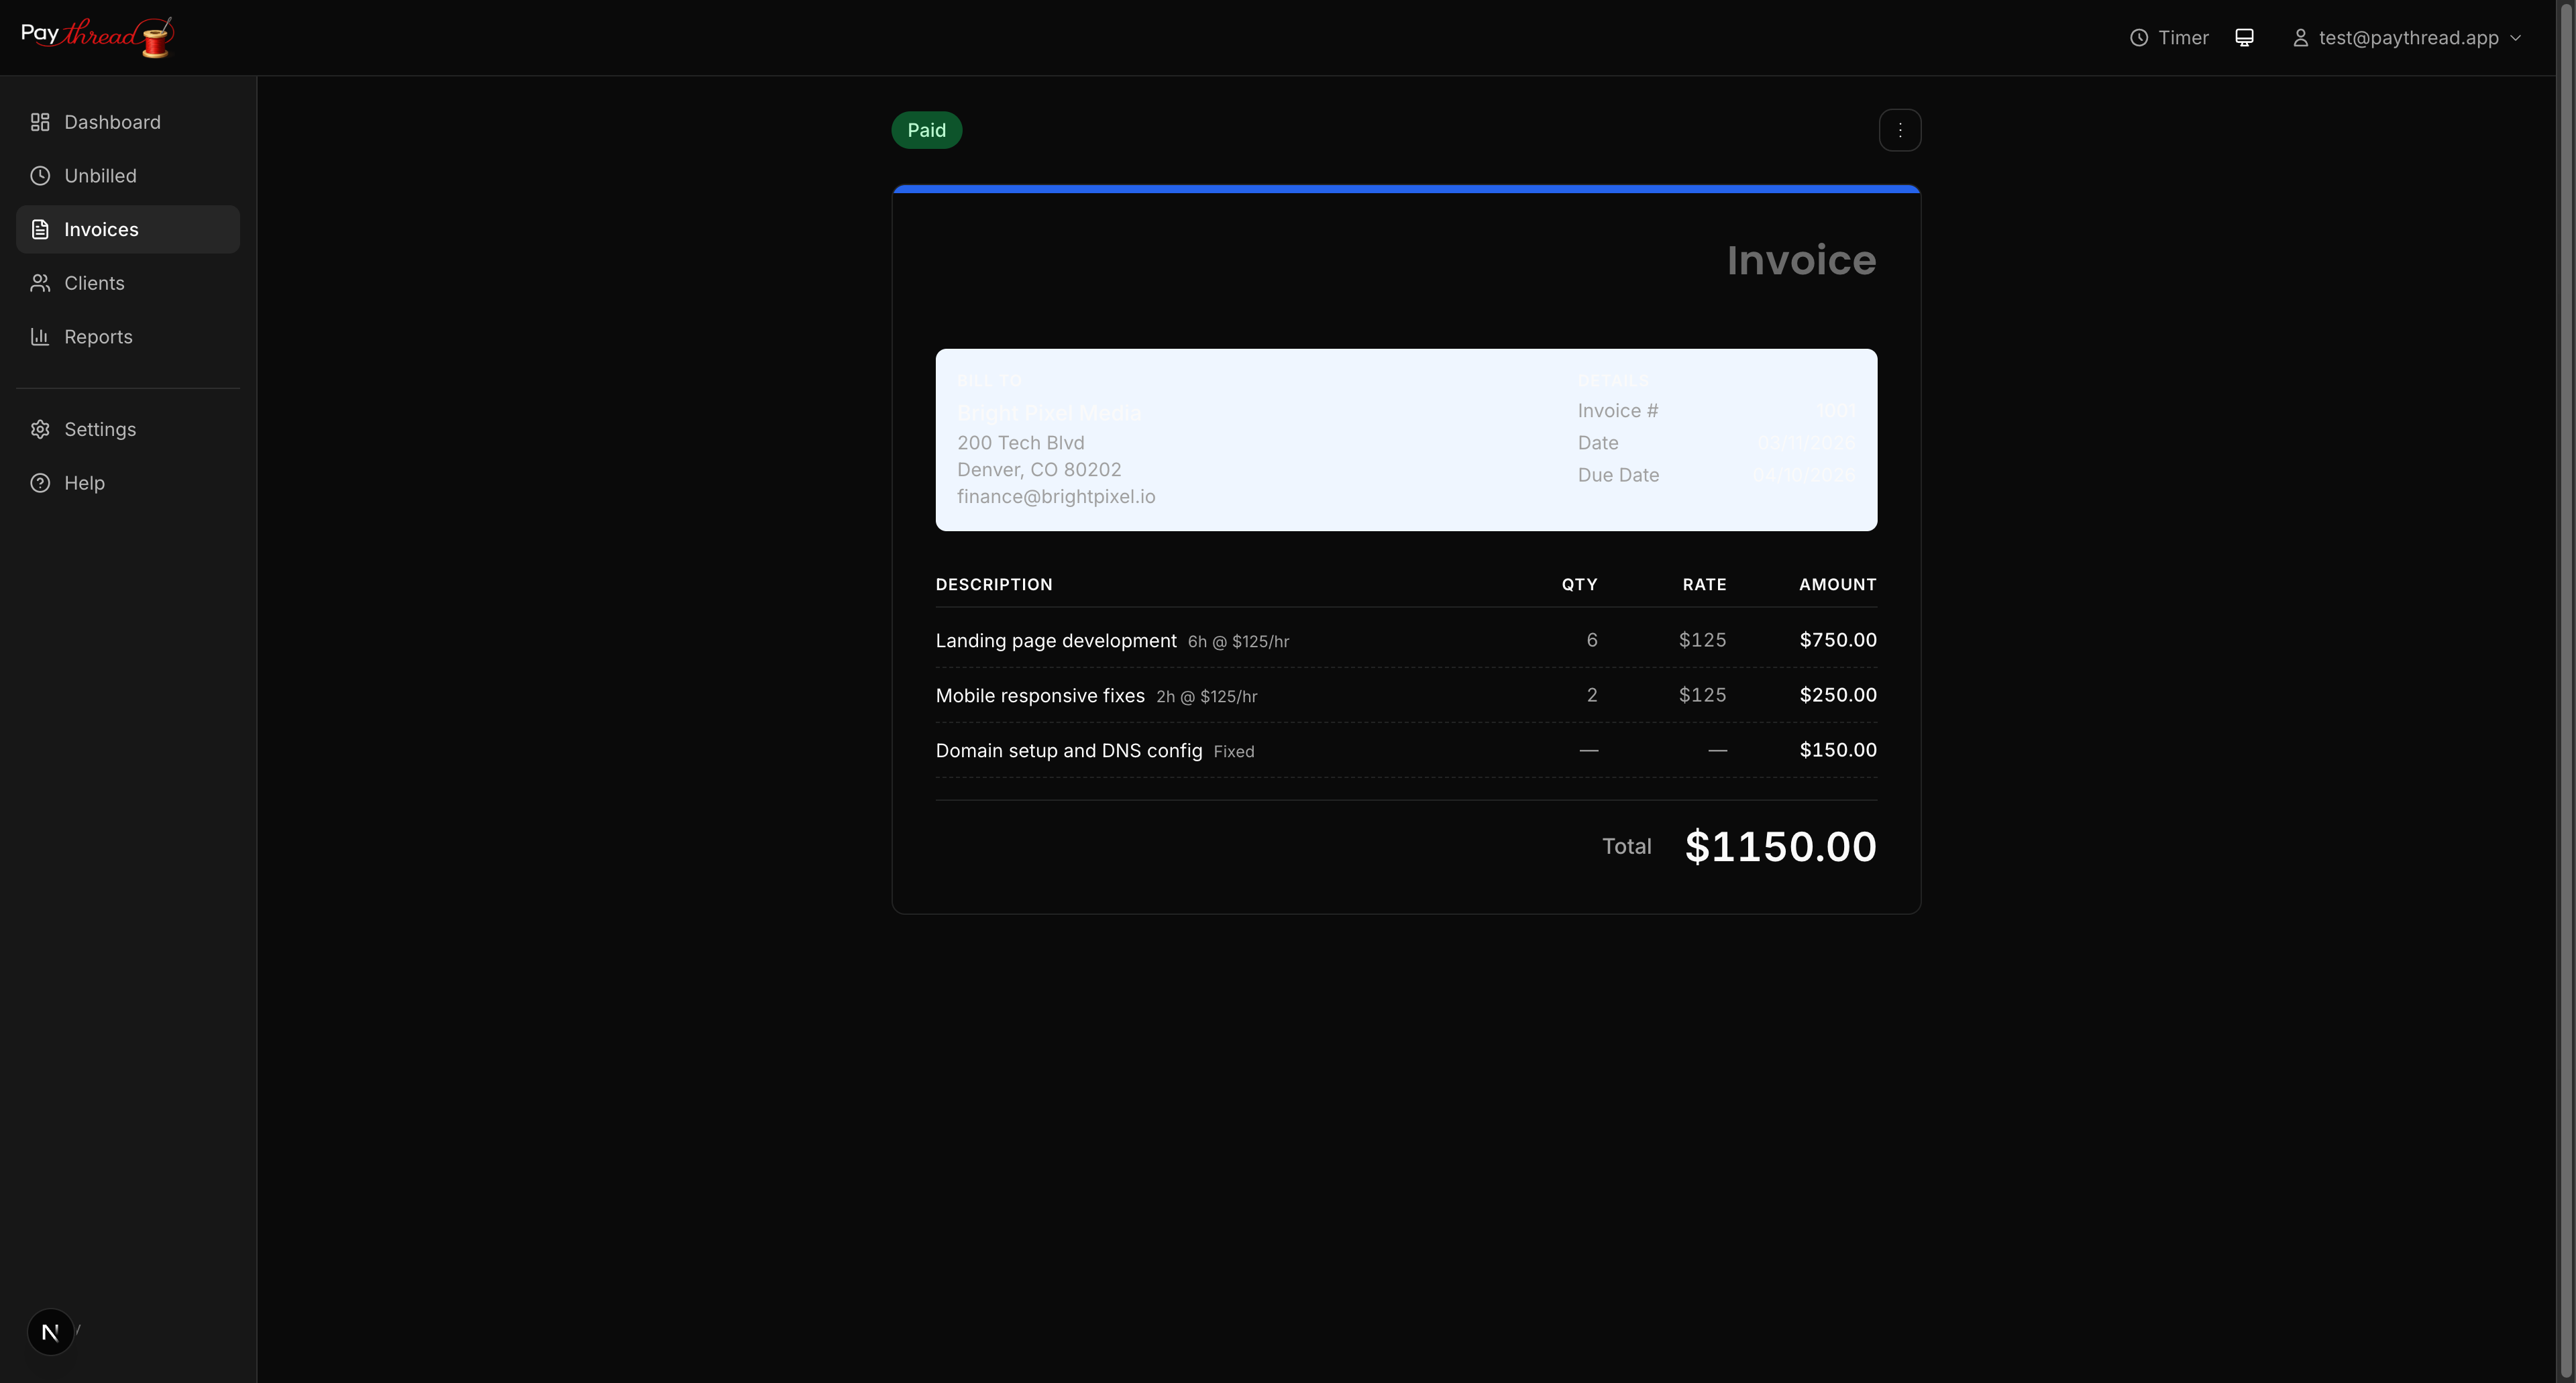
If you connected Stripe, there's a payment button right on the invoice. For other methods like bank transfer, PayPal, or Venmo, your details are displayed so the client can pay through their preferred channel.
Step 6: Get Paid
When your client pays, mark the invoice as paid in Paythread. This updates your records, moves the invoice out of your outstanding list, and reflects the payment in your reports and tax summaries.
Step 7: Track and Repeat
Your invoices list shows the status of every invoice you've sent. At a glance, you can see what's been paid, what's pending, and what's overdue.
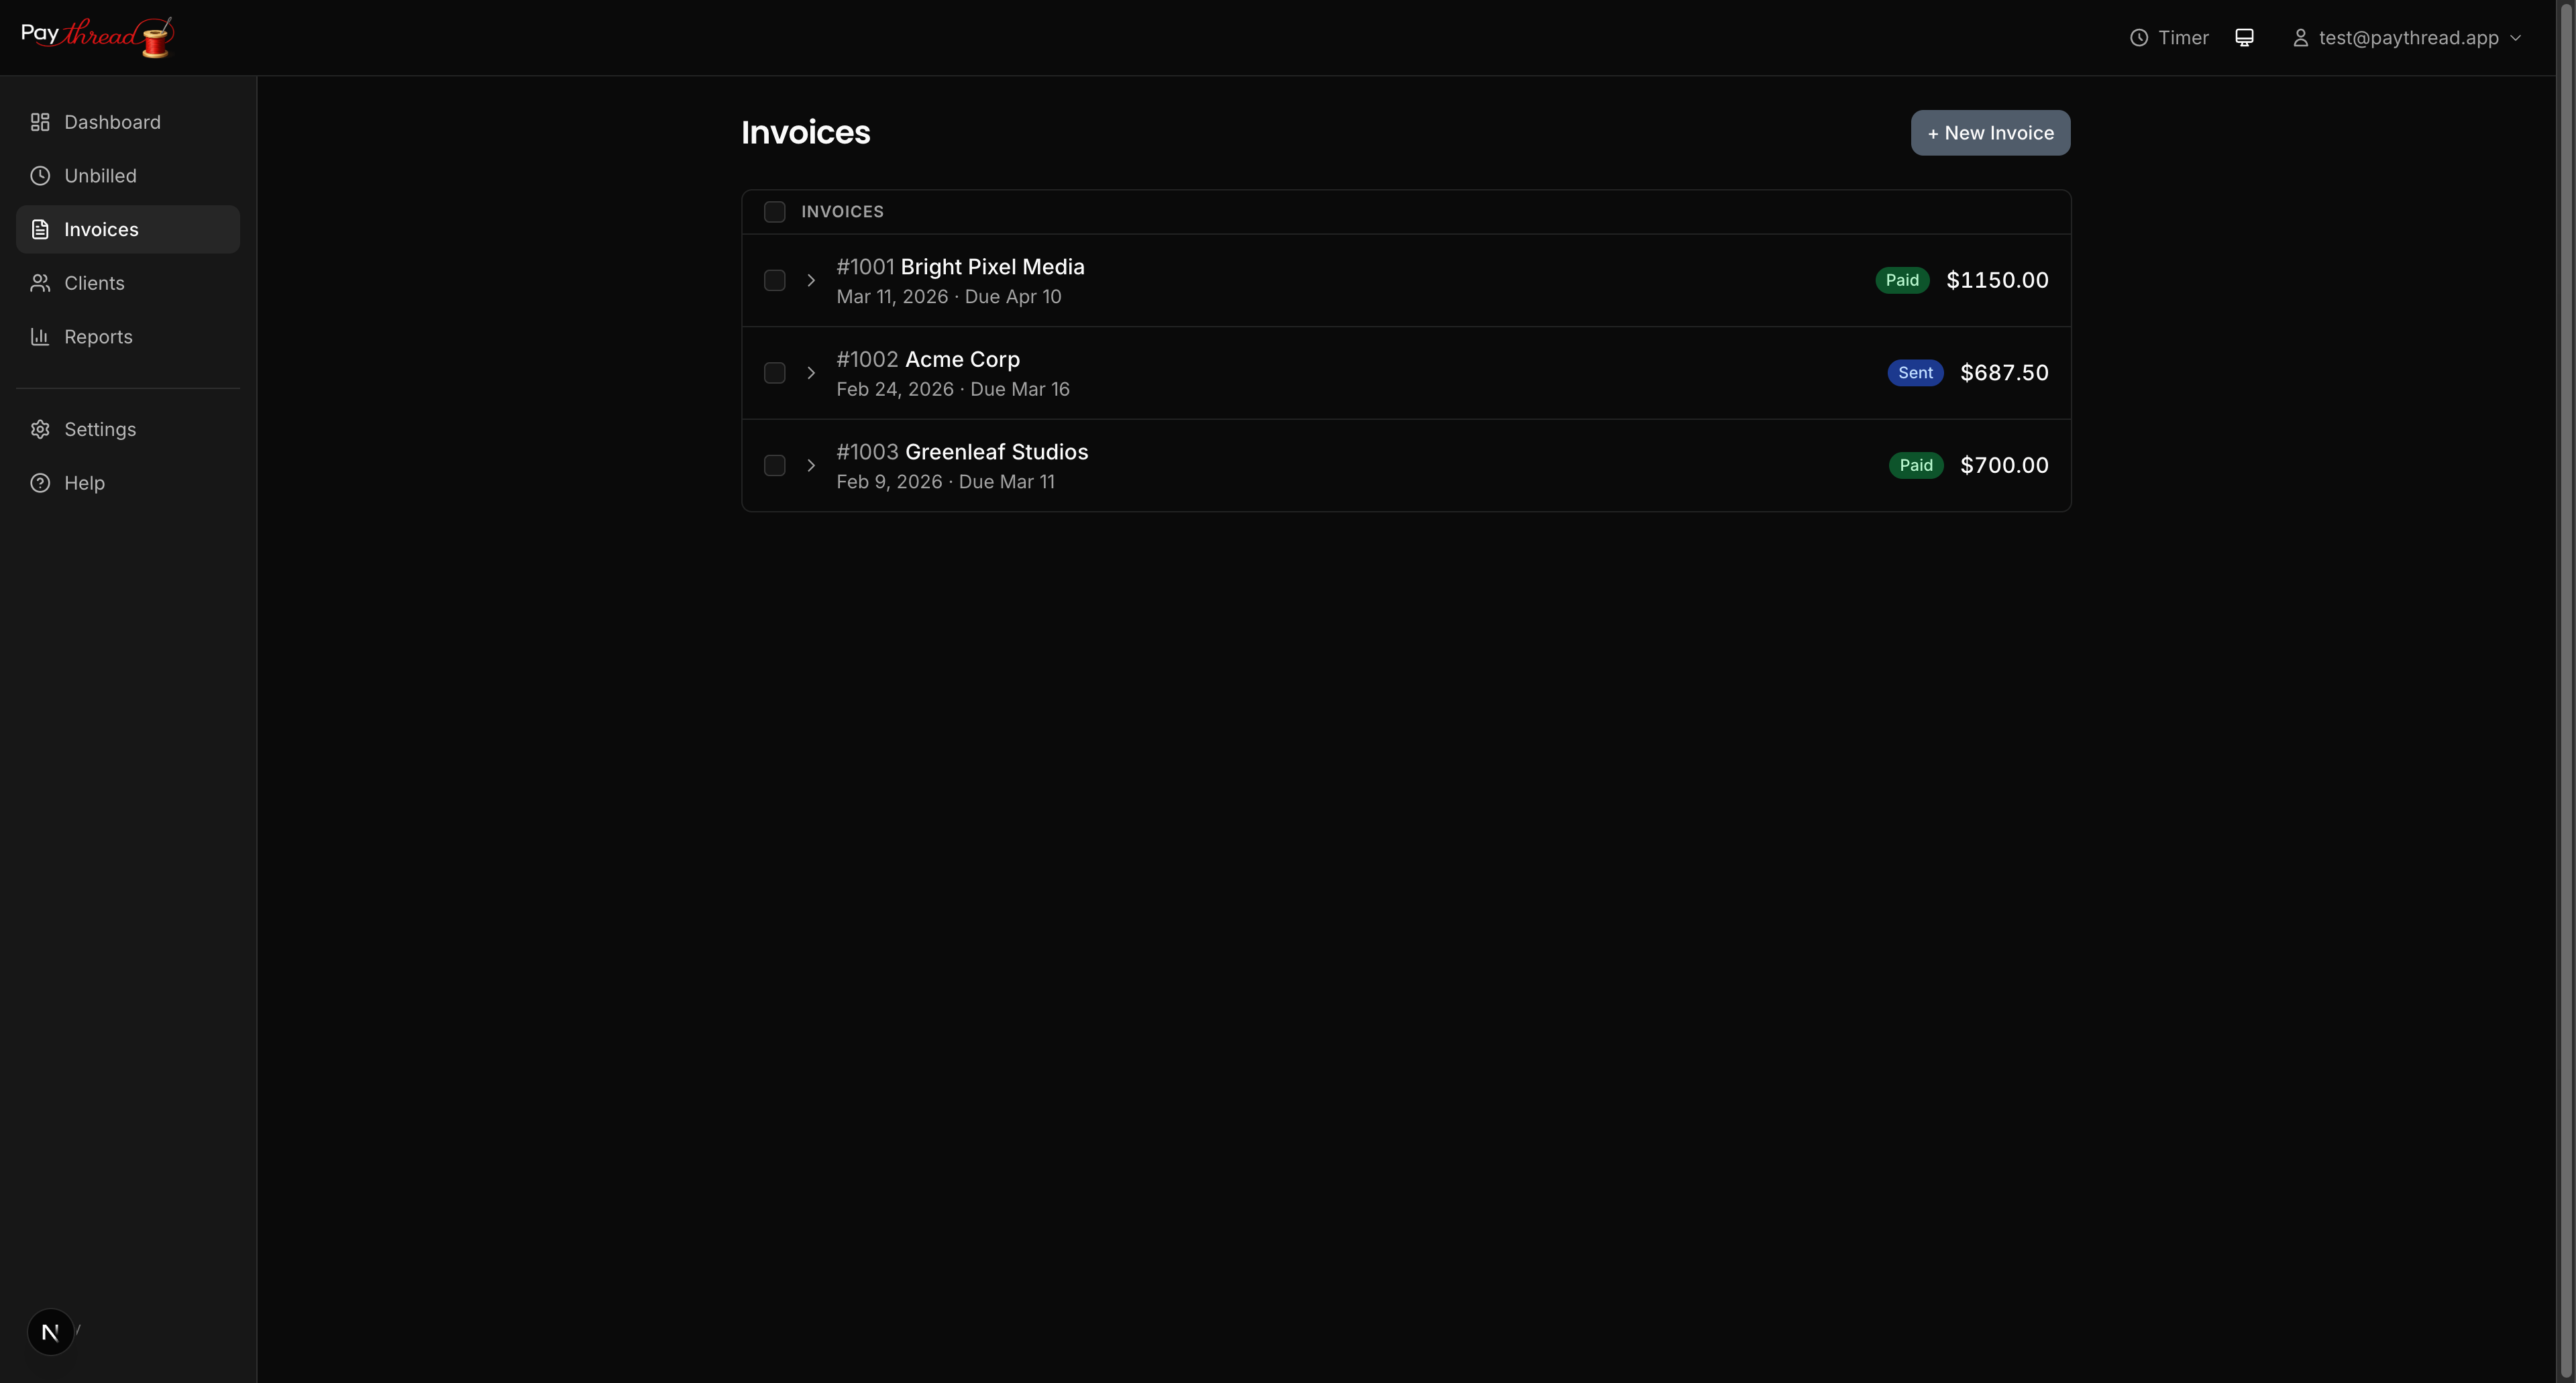
This is where the weekly rhythm kicks in. Each week you track work, review unbilled items, send invoices, and follow up on outstanding payments. The flow stays the same whether you have one client or twenty.
The Full Lifecycle at a Glance
- Start timer (or create fixed/multiplier item)
- Stop timer, review and save the work item
- Review unbilled queue, clean up descriptions
- Select items, build invoice, choose template
- Send invoice with payment link
- Client pays, mark as paid
- Check invoices list, follow up as needed
Every feature in Paythread exists to support this flow. Once you've run through it a few times, it becomes second nature.
What's Next?
If you haven't customized your invoices yet, start with Invoice Templates & Customization. To set up your payment options, see Managing Payment Methods. And when tax season arrives, Preparing for Tax Season with Paythread shows you how all this tracked data turns into tax-ready reports.